Basic Glove Pattern: "How Do I Add a Stitch Pattern to It?"

I have this pretty popular basic glove pattern on Ravelry. It has around 26,600 unique downloads so far. Yup. It’s that popular. Okay, so the fact that it is free has a lot to do with that number, I’m sure. But still, I’m pretty proud that the pattern has served so many people so well. I pride myself in writing very clear patterns, so that a person can visualize what is taking place step by step, and several people have commented on it as well written. So if you haven’t yet made a pair of gloves, this pattern is a really good place to start. Click on the patterns link at the top of my website, and you’ll see the pattern “Basic Gloves” on the All Patterns Page. It is available in English and Spanish. (Thank you Siona, for translating it into Spanish!) If someone wants to translate it into German, French, Russian, or any other language for my Ravelry page, contact me!
Aileen recently wrote me with a question: “When the pattern casually states to reverse directions for the left side or left hand my brain shuts down. My question is: using 4 double pointed needles, how would you center, for example, a 6 stitch cable on the back of gloves? Then, how do you get it in the right place on the left glove?” Aileen made clear that she had not yet seen my specific pattern, which actually does not include the dreaded casual statement mentioned, because a basic glove with a basic standard gusset is totally reversible. You just make two gloves the same way! But Aileen’s question was a very good one, since when you add a design, then indeed, the sequence of stitch counts on how to achieve that stitch pattern on the left hand glove and right hand glove are now different. But with the standard gusset, it is still fairly easy. Using the stitch count for the hand size Aileen had chosen and her desired insertion of a 6 st cable, here’s the answer to her question:
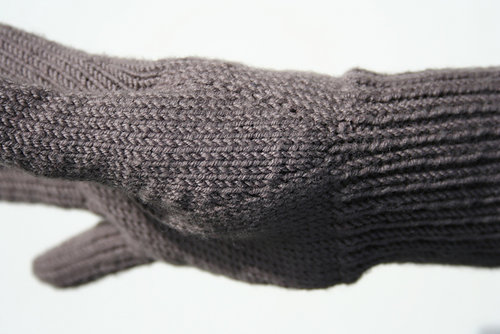
My basic glove pattern utilizes the standard thumb gusset on the side, so that the same number of stitches are used for both the back and the hand of the glove. Worked plain, with no pattern stitches on back of hand, both gloves are knit the same and are totally interchangeable.
If you add a stitch pattern to the top of the hand, then the gloves are not longer interchangeable, but the placement of the stitch pattern is still pretty easy. You have the same number of stitches before and after the markers that delineate the standard thumb gusset section. For the right hand glove, the number of stitches in the stitch pattern design is centered in the stitches prior to the thumb gusset. For the left hand glove, the number of stitches in the stitch pattern design is centered in the stitches after the thumb gusset.
Using the 44 stitches Aileen was using from my pattern for her chosen hand size, and a 6 stitch cable pattern, applying the principle above would be like this for the right hand glove: In the pattern, after completing the ribbing, you increase one stitch to 45. You will have 22 stitches for back of hand, then a marker and one stitch and another marker, then you have 22 stitches for palm of hand.
22 stitches for the back of hand minus 6 stitches for the cable leaves 16 stitches. 16 stitches is divided by 2 to give you 8 stitches on each side of cable on the back of hand. Starting at beginning of the round, work 8 stitches, work 6 cable stitches, work 8 stitches, slip marker, work gusset increases and/or stitches, slip marker, work 22 stitches to end of round. As you do rounds, continue this basic sequence, growing the gusset with increases as the pattern indicates, and of course, working your cable.
For the left hand glove, it would be done this way: Work 22 stitches, slip marker, work gusset increases and/or stitches, slip marker, work 8 stitches, work 6 cable stitches, work 8 stitches which brings you to end of round. Continue this basic sequence, growing the gusset with increases as the pattern indicates, and working your cable.
When you remove the stitches onto waste yarn for the thumb, you will cast on 1 st to close the gap, meaning you have 45 stitches. So just remember to maintain the first 22 stitches as specified above for whichever glove you are working on, then the one stitch will be worked, and then maintain the last 22 stitches as specified above for whichever glove you are working on.
For sake of simplicity, I would end the cable at the point that you work up to 3.25” (4” in larger sizes) above ribbing just before starting the little finger, since very soon you will need some of those stitches previously used for the cable to start shaping the ring finger and middle finger.
If you wanted to put two 6 stitch cables on the back of the hand, then the right hand glove would be: Starting at beginning of round, work 3 stitches, work 6 cable stitches, work 4 stitches, work 6 cable stitches, work 3 stitches, slip marker, work gusset increases and/or stitches, slip marker, work 22 stitches to end of round. Continue in this fashion.
Left hand glove with two 6 st cables would be: Work 22 stitches, slip marker, work gusset increases and/or stitches, slip marker, work 3 stitches, work 6 cable stitches, work 4 stitches, work 6 cable stitches, work 3 stitches, which brings you to end of the round.
That’s it! Sometimes it can be a bit more complex if the numbers don’t come out even on each side and then you have to decide which side will have the extra stitch or stitches.
And you don’t need to worry about the distribution of stitches on your 4 double pointed needles (using a fifth needle with which to work). It doesn’t matter how you distribute the stitches since your beginning of round marker shows you the beginning of the round, and the other two markers delineate gusset stitches between them. Of course, you’ll need your cable stitches on the same needle to do them easily, but as long as that is maintained, there is no specific arrangement of stitches on your double pointed needles..
Enjoy knitting the glove pattern!
